Saturday, March 27, 2010

My very first roasted chicken

Lately, I've been watching a lot of Food Network while I'm at the gym. Tuesday, I caught an awesome episode of Giada De Laurentiis making a roasted chicken with spinach pasta and I decided to give it a try this weekend.

I've never actually roasted a chicken before, and with my oven being so uneven for heating, I was a little worried.

This dish relies on fresh oregano, lemons, oranges and garlic for a really fresh flavor. That was really the best part of this dish - how flavorful the chicken turned out.

One of the things that I realized at knife school is how much a cook really should be handling the meat. I gave the chicken a good wash, swished out the cavity and then played around with it a little.

Next, the orange, lemon and a bulb of garlic get cut into chunks and stuffed into the cavity of the chicken.

Lots of kosher salt and pepper inside the cavity (before loading it up with the fruit), and also patted all over the bird. I also cut a tiny slit at the other end of the skin and patted some under the skin, in hopes of really getting down into the chicken.

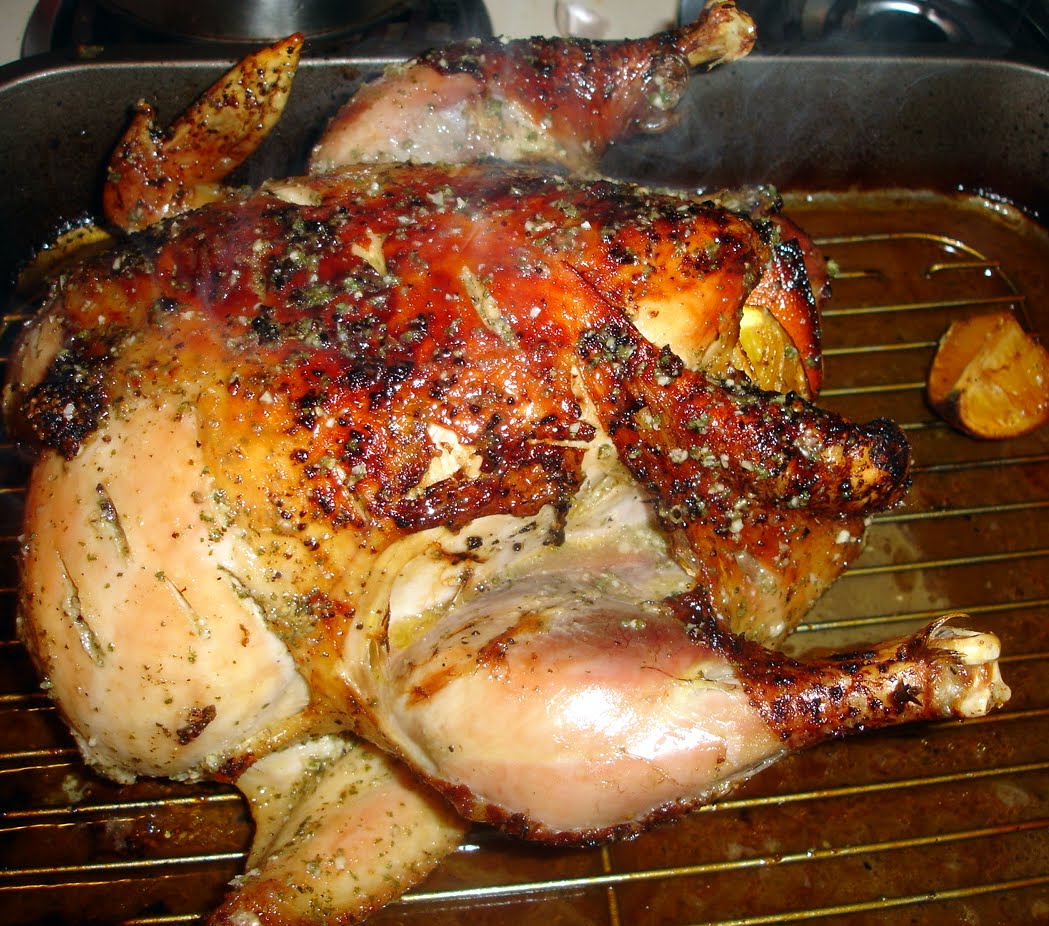
Set the bird breast side up on a rack in a roasting pan and roast at 400 F for one hour.

My oven is REALLY hot and fairly unpredictable. I had it at 375 F for about 40 mins and the bottom of the pan was already starting to sizzle, so I pulled it out and basted.

I poured about a cup of stock into the bottom of the pan to deglaze (you use it for a sauce later). The recipe also calls for a glaze made of orange juice, lemon juice, olive oil, garlic and oregano. I brushed it on every 25 mins or so until the chicken was done.

As expected, things got a bit crispy. If I had been thinking ahead, I probably would have bought some foil to cover this for part of the roasting to help keep the skin from burning. I also ended up pulling the chicken out 20 mins before recommended, and one of the legs/thighs wasn't cooked all the way through.

Carving didn't go quite as slick as planned. I think I could stand to find a YouTube video on carving chickens. I'm sure they exist by the dozen.

The side dish to the chicken is a spinach and cheese sauce, heavy on the spinach. Giada used goat cheese, which I don't usually have around the house, so I subbed some shredded Swiss and cubed Jarlsberg. Tasted just fine!


The end results were delicious. The chicken was really tender, and I thickened the pan juices a little (extra juice squeezed from the cavity fruit wedges and strained into the mess from the pan) to make a really sweet and savory gravy.


And the pasta was really fresh and creamy tasting without being too heavy. There was extra sauce, so I'll definitely be making this again soon.


Dreaming? of my next, not-so-burnt roasted chicken

Sunday, March 21, 2010

Chicken! Inspired by curry


Ok, so this week's Serious Eats Weekend-Cook-and-Tell was based on curries. 
I was super excited, and by Friday I had my game plan. I consulted with a friend, Shruti (@inothernews), who, being Indian, I consider to be an expert of the curry realm. She gave me 2 awesome looking recipes for shrimp curry. I did a Google search, and found an Indian market a few blocks from my house.

It all went downhill when I headed out to the Indian market and found this: 

Where my market should have been: a Seven Eleven, a Greyhound bus station, and a Chinese restaurant. #Googlefail

I'd like to say that my friendly neighborhood Giant Foods came to the rescue, but let's not kid ourselves. I was able to pick up some mustard powder, but none of the other ingredients Shruti had directed me toward. 

So, back to the chicken. I had these chicken drumsticks I picked up last week at HMart. $7.50 for 18 drumsticks. Yes. I threw 8 of them into the crock pot with some stock and a hodge podge of spices: 8 cloves of garlic, ginger, a ton of kosher salt, white pepper, a sprinkling of garam marsala, some yellow curry powder I picked up from an Ethiopian place, and some chili powder. I let them go until the chicken was nearly falling off the bones. 

The chicken went into the oven at 325 to crisp up the skin, and in a sauce pan, I mixed 2 cups of the crock broth, about 1 1/2 c Greek yogurt and about 1 TBS cornstarch until a creamy, dark yellow sauce formed. 

I also made some rice - sushi rice was all I had in the house (and Giant wanted ridiculous amounts of money for a small sack of basmati), so I made rice with some more of the seasoned broth. 

You've already seen the results. It was delicious! But, sadly, I feel it's ingenuine to my friend - who tried to help my cause - and basically an insult to an entire culture to call my dish "curry." So - chicken and rice, inspired by curry. 

But, for next time, here's the recipe:

Shruti's shrimp curry
2 pounds shrimp, peeled deveined
2tbsp coriander powder
1 tsp pepper, crushed
10 karhi (curry) leaves (if you can get them)
1 tbsp lemon juice
vegetable oil
1 tsp black mustard seeds
1 onion, chopped
5 cloves garlic, in slivers
1 tsp fresh grated ginger
2 tbsp paprika
3/4 tsp cayenne
1/2 tsp turmeric (I saw fresh turmeric at my whole foods today!!)
3 hot chilis (less if spice averse)
14 oz of coconut milk.

1. heat few tbsp of oil, when hot, add the mustard seeds , when they are popping, add the curry leaves, if using. then add the onion and garlic, stir fry until lightly browned then add the ginger.
2. add 1 cup of water, turmeric, salt, chilis, coriander and pepper and paprika and cayenne and lemon juice and bring to a boil. simmer for 5 minutes.
3. add the shrimp stir around until they are opaque, stir in coconut milk. heat it through and serve!

dreaming? of *real* Indian food. I think I have a Groupon for an Indian place nearby! 

Sunday, March 14, 2010

Happy St. Patrick's Day!

Ok, a bit early. But I had my friends over for a big corned beef and cabbage dinner today.

St. Patrick's day is one of my favorite holidays, mostly because of the meal involved. My mom's side has done a big St. Pat's dinner the last couple of years that I've been around. Lots of fun (as is always the case with them), and a TON of food.

I only have one full-sized burner, so it involved a little creative maneuvering of pots and pans. By the end of the night, I had 4 corned beefs, 2 soda breads, 2 1/2 cabbages and about 7 lbs of potatoes.

The soda bread is my Nan's recipe, which I've written about before. In an attempt to cut down on the number of dishes, I did the bread in one bowl.

Cut up butter, sugar, salt and baking powder. Technically this is something that could be done in my food processor, but it seems more traditional to do it by hand.
Buttermilk, of course, the secret ingredient to Irish Soda Bread.

Egg wash keeps the inside moist and gives the outside a great crust.

End result? Beautiful.

Next up? the corned beef. I seasoned with kosher salt and white pepper, bay leaves then covered with water. I started one in my crock pot and one in a stock pot. The crock never got quite hot enough, so I had to finish the crocking one in the stock pot.

When the meat comes out of the boiling stock (after about two hours), score the fat side. Mix a paste of dark brown sugar and Guinness (or whiskey in a pinch) and spoon over the top of the meat. Bake covered at 375 for about 15 minutes, then uncover for another 10-15 minutes.

Flip the meat and score the other side. Spoon the remaining paste into the back side of the meat and bake uncovered at 375 until a nice glaze forms.
While the meat is baking, put the cabbage (cored and cut into quarters) and potatoes (also cut into quarters) into the same pot as the stock.

Season with salt and pepper as needed. Serve with butter and Irish soda bread.

Dreaming? of TONS of leftovers from this giant feast.

Up, up and away!

Today was an awesome day for cooking/baking.

I took the opportunity to bake the cake inspired by the new Pixar movie "Up," from this Serious Eats Cakespy post.


Not a perfect cake by any stretch of the imagination. The cake was much denser than I imagined it would be, especially after I burnt the outsides and bottoms of the cake a little. The frosting was amazing though.

The main alteration I made to the original Cakespy recipe was using lemon zest instead of 2 tsp of lemon extract. Baking can be an expensive habit, so the thought of picking up food coloring *and* lemon extract didn't really seem worth it. Bag of lemons on the other hand? Definitely. So I zested 3 lemons and toss that into the creamed butter and sugar.

Speaking of the butter and sugar: 3 sticks of butter and 3 cups of sugar. The recipe suggested creaming the butter and sugar for 20 minutes. Yes. 20 minutes. Clearly, written by someone who owns a standmixer. Not this girl. My handy-dandy hand-mixer started to smell a little crazy after about 8 minutes, so I shut it down and let it rest a few minutes. I added a bit of extra time in between each of the 5 eggs, hoping to make up some of the remaining 12 minutes.

The original recipe also didn't have a specific number of drops of blue food coloring, so I guessed. I had about 7 or 8, but it turned out not to be quite enough. The yellow of the lemon turned it slightly green. I'd probably use more like 12 or 15 next time around.

Anyway, it looked beautiful once it was frosted. Again, lots more butter involved.

Tons of coconut pressed into the cake, and some bent DumDums pressed into the corner. Beautiful.

Inside view of the balloon cake.

Dreaming? of floating away in an adorable blue and white, coconut house with little candy balloons.

Tuesday, March 9, 2010

Knife School!

So last night I finally cashed in on my last Christmas gift from Jake: a knife skills course at Culinaerie, a local cooking school downtown.

I trussed and spatchcocked a chicken, then learned how to supreme an orange, and got complimented by the Chef as she walked by and saw my diced carrot (!) - though it was a bit uneven, it was much smaller and finer than the others around me. I also learned I hold my chef's knife a bit like a spaz and learned to get a bit more control on it. Nice -- sure that will come in handy long term!

What I learned most of all, is that I could not survive in a real chef's kitchen, or therefore, culinary school. I cook so much now, I have developed my own style for things, and am used to using my own tools and my own methods. I dice unevenly. This does not bother me. But my pieces, no matter how tiny, are uneven and would probably be trashed on the spot in a "real" kitchen.

The culinary arts intrigue me - especially after having read Julia Child's memoir, but I'm fairly certain that's not a path for me. I hope to continue taking "recreational" courses that focus on one skill or another, like the knife skills course, simply to learn from a real chef and boost my techniques.

Monday, March 8, 2010

A Momofuku spin on tteok

David Chang, owner of the Momofuku restaurants and writer of the cookbook, is Korean American and describes his memories of having tteok bogi as a child. 

Tteok bogi is a big favorite of Jake's, so it was a natural sidedish to go with the ssam I was cooking last night. Chang writes about his grandfather's method of pan roasting the tteok, so I decided to give it a try.

I parboiled the frozen tteok (though, I imagine if you were using fresh, you could skip this), then scraped the burnt pork off the pan and tossed in the tteok with a little oil spray.
The results? Jake and I both decided this kind of tteok isn't always for us - but would definitely be welcome from time to time. The tteok gets crisp on the outside, but are still wonderfully chewy on the inside. The grit from the pan adds a little smoky flavor to the dish.

Pan-roasted tteokbogi, inspired by the Momofuku cookbook. I made the sauce the way I usually do (diverging from Chang's recipe here) in a separate, small saucepan and poured it in at the end of the dish, then allowed it to thicken.  Bring 2c water (use the water you par-boiled the tteok in, to capture any starch that may still be left - it will thicken your sauce nicely), 2-4 TBS gochuchang (Korean red pepper paste), 2 tsp sesame oil, 1/2 TBS sugar to a boil, then reduce to about 1 1/2 c. It should coat the back of a spoon and drip slowly, more of a syrup than a total liquid.

Sunday, March 7, 2010

Momofuku inspired ssam


Finally back to the cooking! I finally used a gift card from the end of my last internship and put it toward a big ticket item: the Momofuku cookbook

In truth, I've never eaten at a Momofuku restaurant. But after just an initial flip through of the book (which is full of recipes, and also the well-written back story of the chain), I think I'm going to have to make it a destination on my next NYC trip. 

I made ssam tonight - which is the feature of one of Chang's restaurants, and one of the items we made on the grill at mine and Jake's recent trip to Hee Been. Being, as previously discussed, one of the worst Korean's in the world, I couldn't actually explain the differences between bossam and ssamgyapsal - in my eyes, they are both sliced pork belly wrapped in lettuce leaves and served in doengjang or ssamjang and grilled garlic. The term "ssam," as best I know, simply returns to the "wrap" portion of the dish.

Following the direction from the Momofuku book, I prepared the sliced pork belly with salt and sugar. I gave it a few cracks of pepper for good measure.

Pork belly acts a bit like giant slices of bacon. It gets crackly and delicious when tossed on a screaming hot grill pan. The pork belly I bought came with the skin still on. I sliced it off, and threw it into the freezer with my many "for stock" odds and ends.

Most Korean restaurants serve thinly sliced raw garlic with their barbecue dishes. It can be a little intense, so it's common at table-top grilling places for people to throw the garlic on the griddle, like I did here. The garlic grills in the excess fat from the pork, and turns brown and sweet.


Ssam pork, grilled garlic, ssamjang (seasoned soybean paste) and lettuce for wrapping. Layer everything inside the lettuce and pop it into your mouth! 


Dreaming? of my future meal-to-be at one of the Momofuku restaurants. 

PS - if anyone can actually explain the difference between bossam and ssamgyapsal, PLEASE do so in the comments! I'm dying to hear the truth on this! 

Saturday, March 6, 2010

Late night hunger, conquered by quinoa


I've had a small bag of quinoa sitting in my pantry for a few months now, and being hungry and not having grocery shopped since coming back from Disney, I decided late last night was the time to use some of it up. 
People have really differing opinions on how to cook quinoa. Mine's from the raw food bins at Whole Foods, so I rinse mine really well before using it. And since I'm usually not making much more than 1 cup at a time, I usually cook it stove-top with about 1.5 to 1 water to grain ratio. 

I seasoned this with some red chili flakes, season salt and paprika, brought it all to a boil and let it cook on med-high with a lid for 10-15 minutes until all the water is absorbed. I stir mine frequently throughout, to make sure the seasoning is evenly distributed and to check on the kernels to see if they've popped yet. 

I also sliced some string cheese into the quinoa and threw in a handful of cashews. YUM. The salty mozzarella brought out the seasonings, and the cashews complimented the nuttiness of the grains. I plan to make a larger batch of this tomorrow with some spinach and bake it so I can take it for breakfast next week!  

Red Quinoa dish:
1 c quinoa
1.5 c water or broth (or half/half - I used about 1/2 c homemade stock)
season to taste with paprika, season salt, chili flakes or other herbs of your choosing
1-2 string cheeses sliced, or about 1/3 c shredded cheese of your choosing
1/4 c toasted cashews (you could probably use any nut you had on hand for this)

Bring grains, water and spices to a boil. Cover and continue gently boiling 10-15 mins until all water has been soaked up, stirring occasionally. Layer cheese, quinoa, cheese, quinoa to help the cheese melt, then stir in nuts. 

Optional: mix in 3/4 c chopped dry spinach, and bake at 325 up to 10 mins.

Wednesday, March 3, 2010

Welcome Home Gifts!

So, there hasn't been much to report, as I didn't do much cooking in Disney World over the weekend.

But, I came home to 2 marvelous surprises.

First, former Washington Post intern classmate Morgan dropped in this week and gifted me a beautiful handmade apron. It's made out of oil cloth, so it'll wipe clean, no matter what I spill or drop on it!


Next, Jake surprised me with the adorable panda dip bowl I tweeted about earlier. Naturally, I loaded it up with pineapple fried rice and went to town.

Posted by Picasa